I mean, why? Why would you ever do that to a Golden Retriever? That’s just monstrous.
Because the world doesn't have enough bad ideas
I mean, why? Why would you ever do that to a Golden Retriever? That’s just monstrous.
I’ve always found color case hardening of old pistols and rifles beautiful. And what really made it more interesting to me was the fact that this finish wasn’t just about the looks, but rather was created to add strength to what was once a fairly low quality steel (low carbon content made the steel fairly weak by modern standards, by adding carbon to the outside of the steel, it made the part stronger.) The colors were just an added bonus. So once I had access to a nice furnace and an abundance of 1018 steel, I wanted to learn how to make my own color case hardened steel.
After trolling the internet for useful information (which is a task unto itself.) I came across a nice source on the Marlin Firearms Collectors Association forum. This went into some detail about the traditional way that Marlin Firearms create their amazing (see the above link for great images) color case hardening in the early 1900’s. Further looking through the Practical Machinist and Home Model Engine Machinist forums and separating the fantastic folk wisdom from scientific fact, I came up with what I felt was a good game plan.
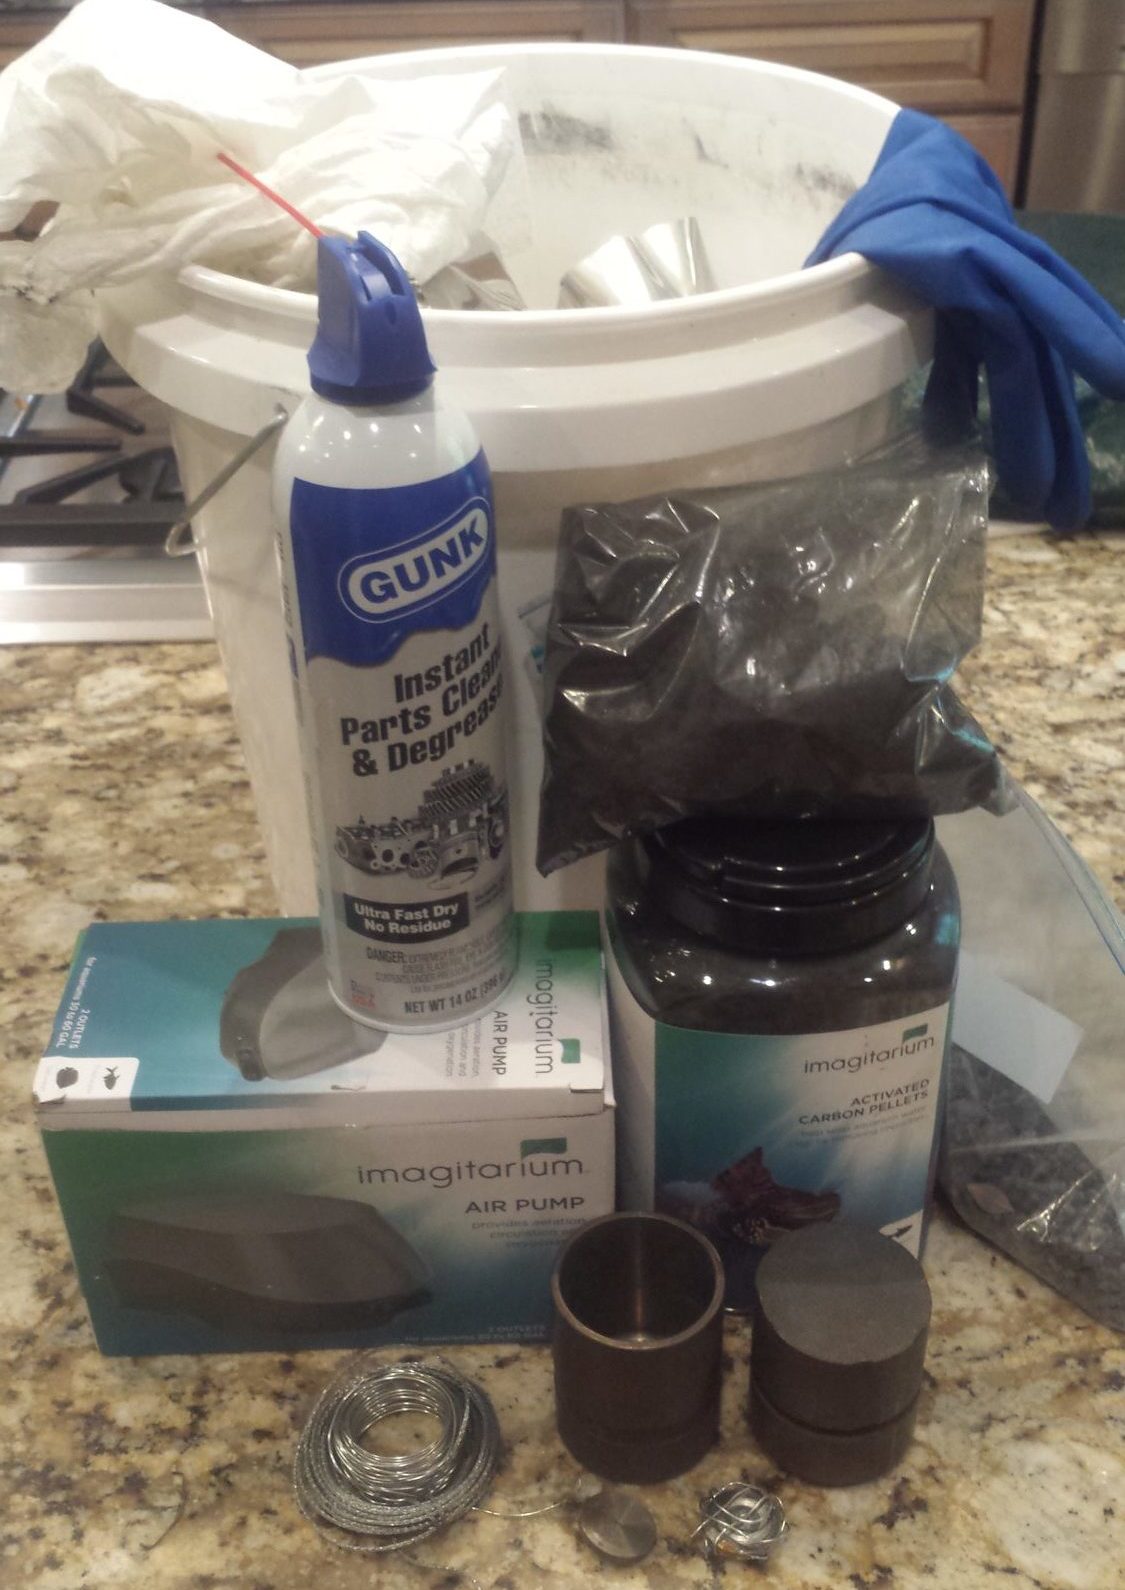
The equipment I used included the following:
The method I went with was as simple and cheap as I could make it. I used small pieces of 1018 steel to test the process. Here’s the basic methodology:
Preparation:
Heat Treat and Quench:

The first time I did this was just about a week ago. Being a learning process, things did not go as well as I would have hoped. It worked, but not as well as I would have liked.
I used a mixture of about 1 to 10, wood charcoal to activated carbon (the wood charcoal pieces were large and needed to be sized down), and set the furnace to 1500F.
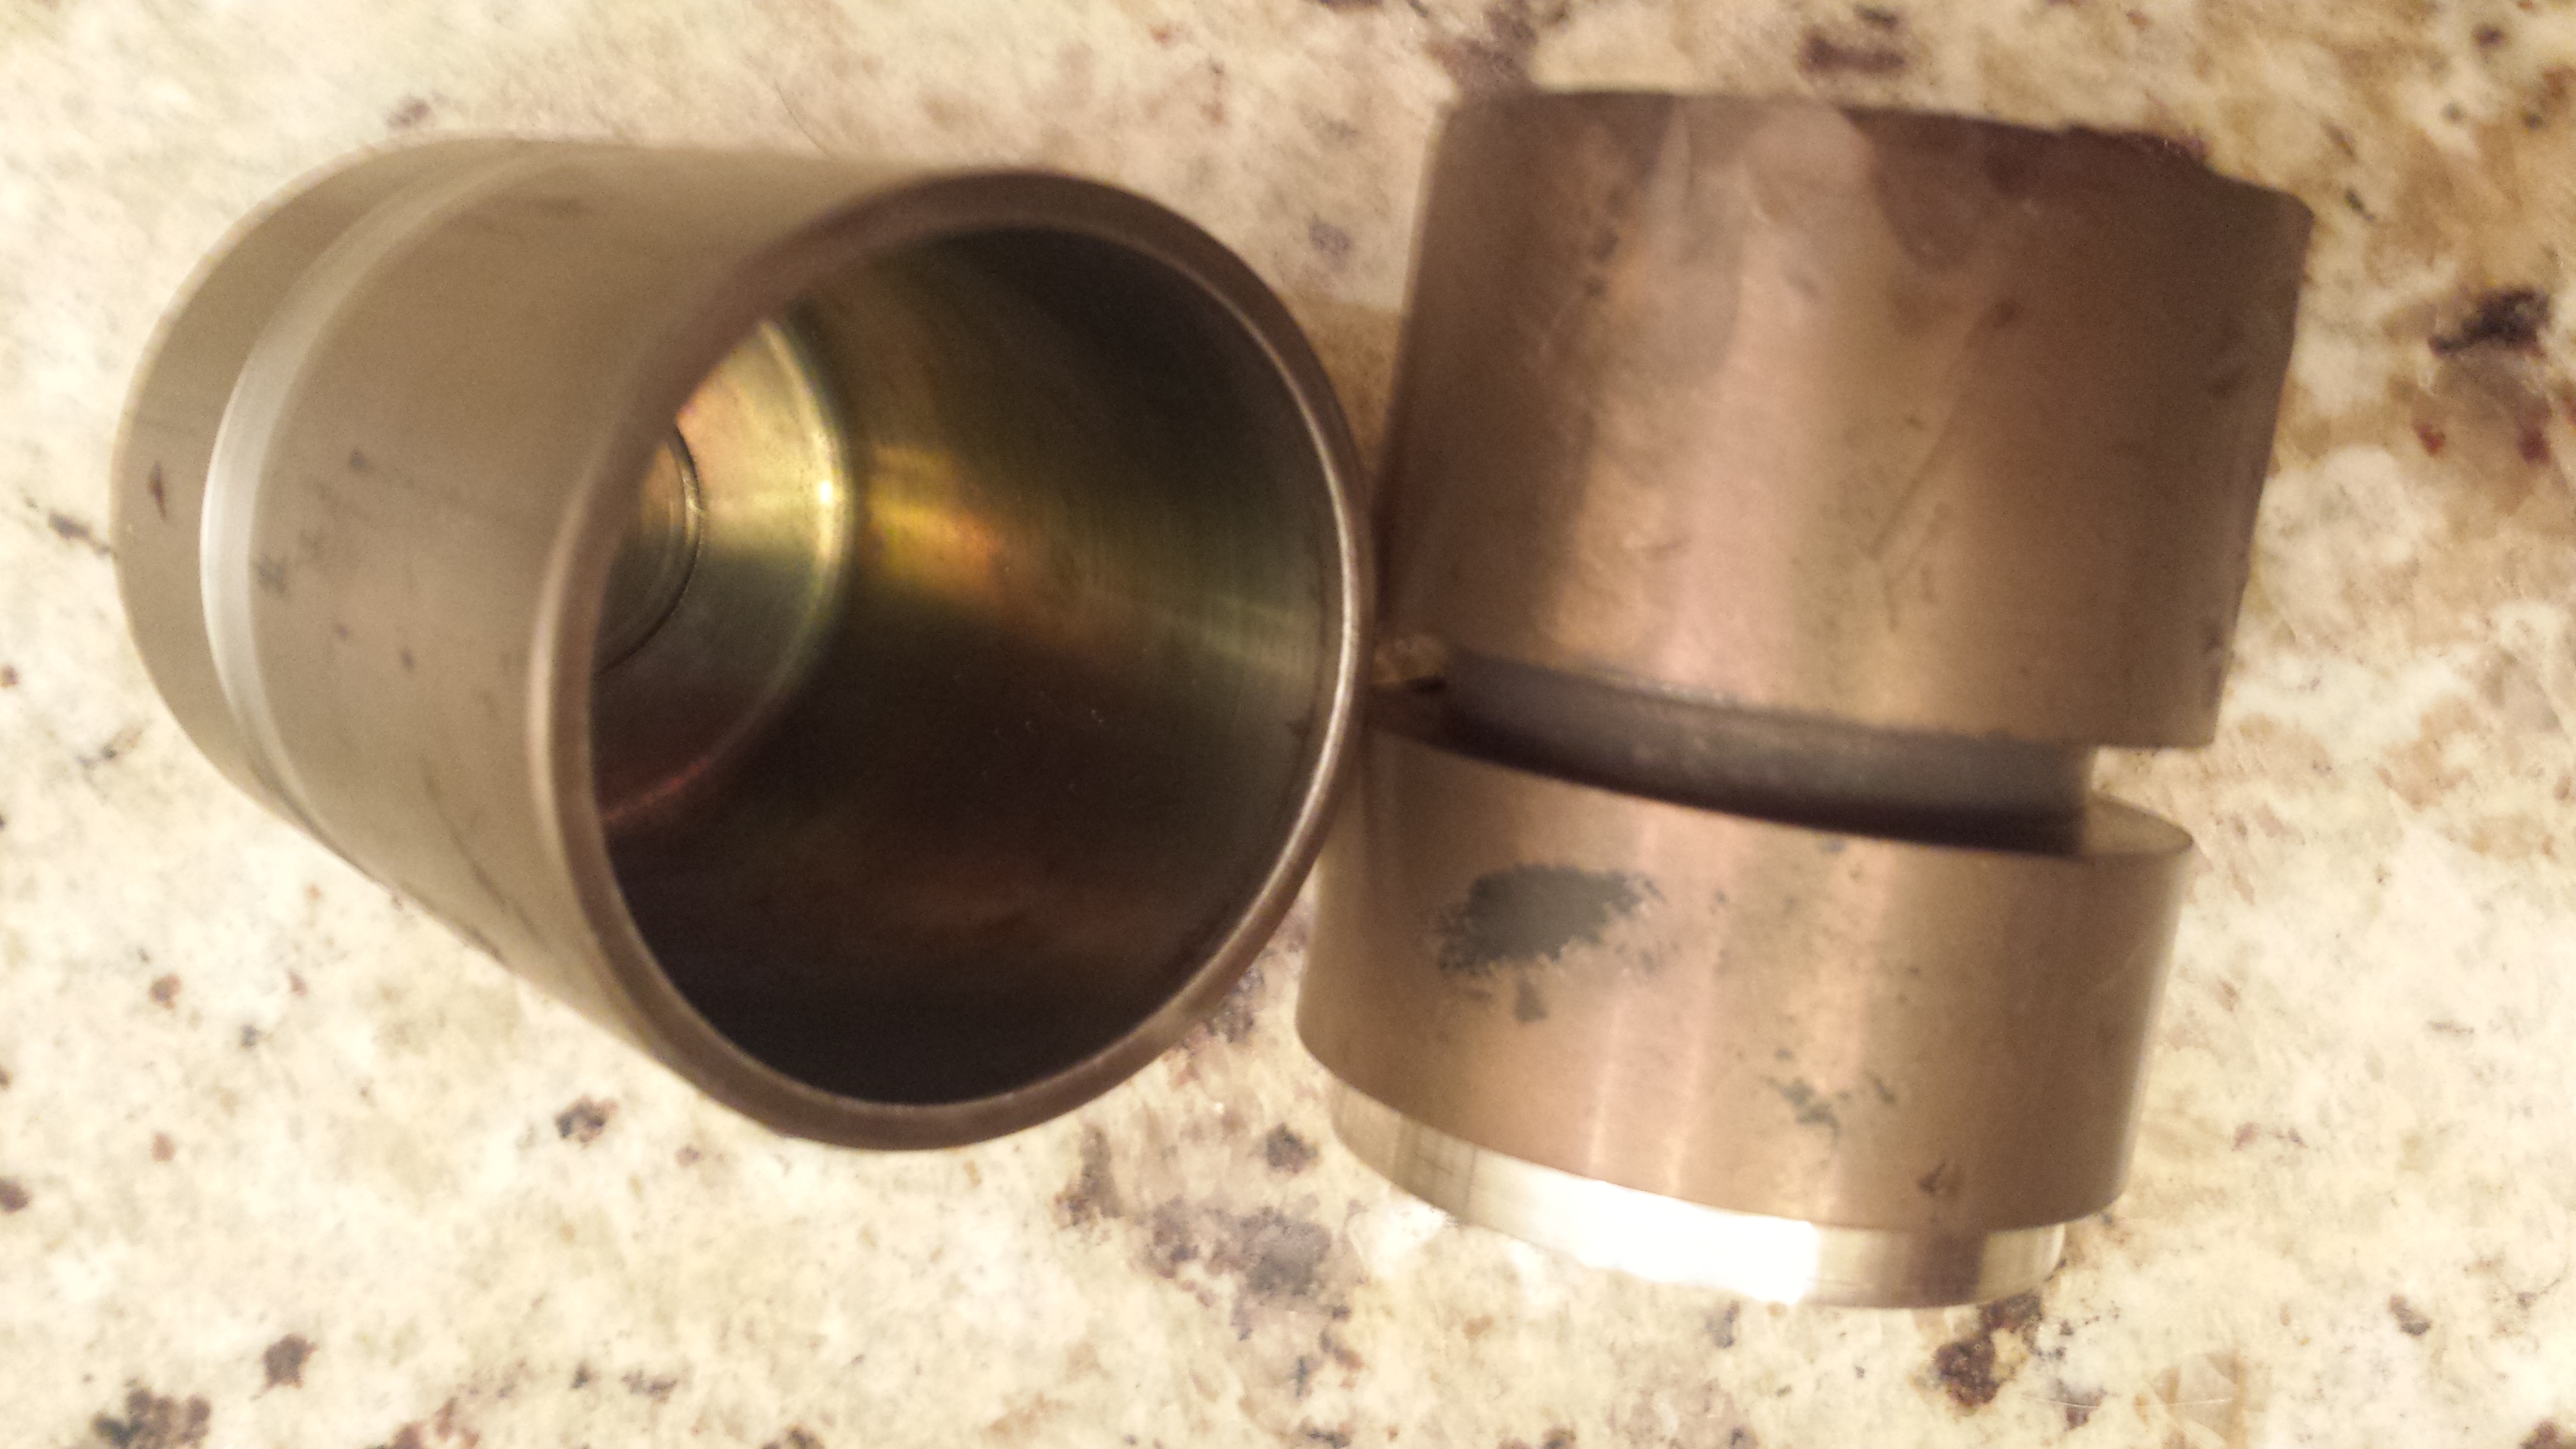
I used a failed Stainless Steel “mug” a student had made as the crucible and made a really large lid for it out of stainless as well (because it was taking too long to cut off a big part, but this turned out to be a good thing).
A friend (Gunsmoke, who has experience in blacksmithing) helped me take it out of the oven. When we took the crucible out of the oven after 2 hours at 1500F, we couldn’t get the top and bottom to separate.
So my buddy literally had to beat on it with a hammer and pliers to get them to come apart. The whole time I was imploring him not to hurt himself. The last thing I wanted was a burn victim from another one of my bad ideas.
And finally the crucible was beaten apart. This is why it was a good thing to have a huge lid, it gave us a big section to hold on to and hammer. We finally were able to quench it, but it probably took about 10 minutes, whereas to get the best colors you’re supposed to do an immediate quench. I’ve already cut a larger clearance in the crucible lid for the next test.
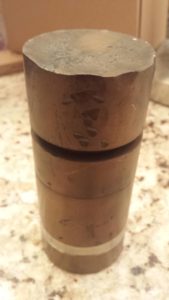
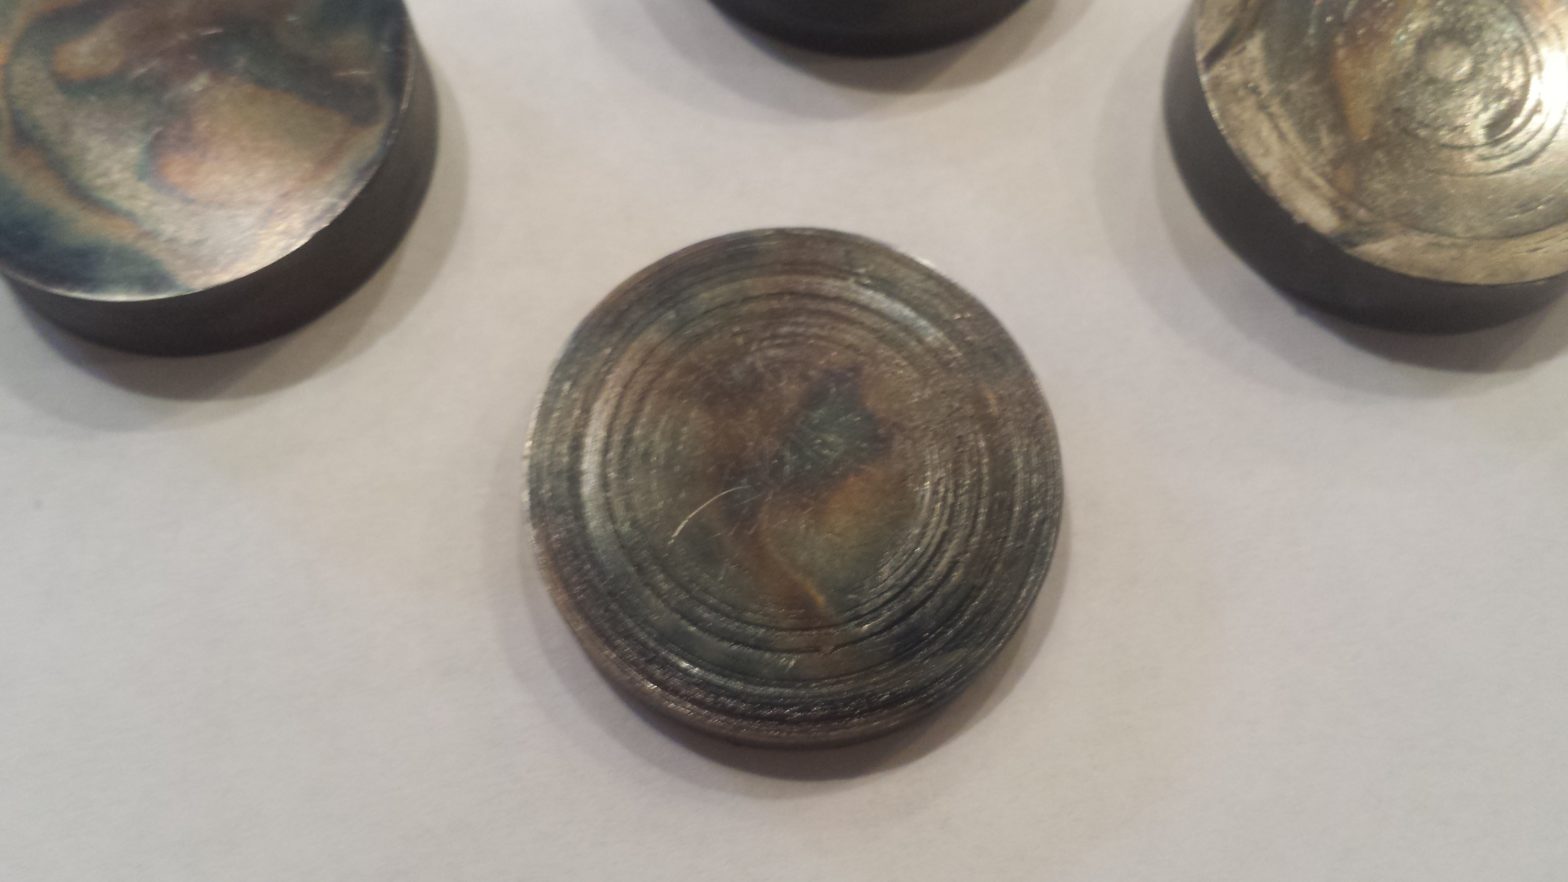
I did get some coloring out of the part, but it also had a small amont of scale distributed around the part, and a large part of the piece was colored a dark brown.
Coming back for the second time, I learned my lesson and made sure that there was at least a 0.030″ clearance around the lid of the crucible.
I also increased the temperature to 1600F (which should help with the thickness of the case hardening.)
The sample pieces used for experiment were simple 1″ diameter 1018 steel rounds of various thicknesses (around 1/4″ to 1/2″), sanded to 320 grit (though the very used up lathe left some nasty marks on the pieces, since this was all about testing, I didn’t care much about the surface finish) Two pieces were ground flat.
I also added the “tums” mixture (The calcium carbonate is supposed to help with the uptake of carbon into the steel, as well as help with the coloring, from the little I’ve read on it.)
Further, I both made the wood charcoal pieces smaller and sieved it into various sizes (to help with packing efficiency) and dramatically increased the amount of wood charcoal used (which was helped dramatically with the smaller pieces)
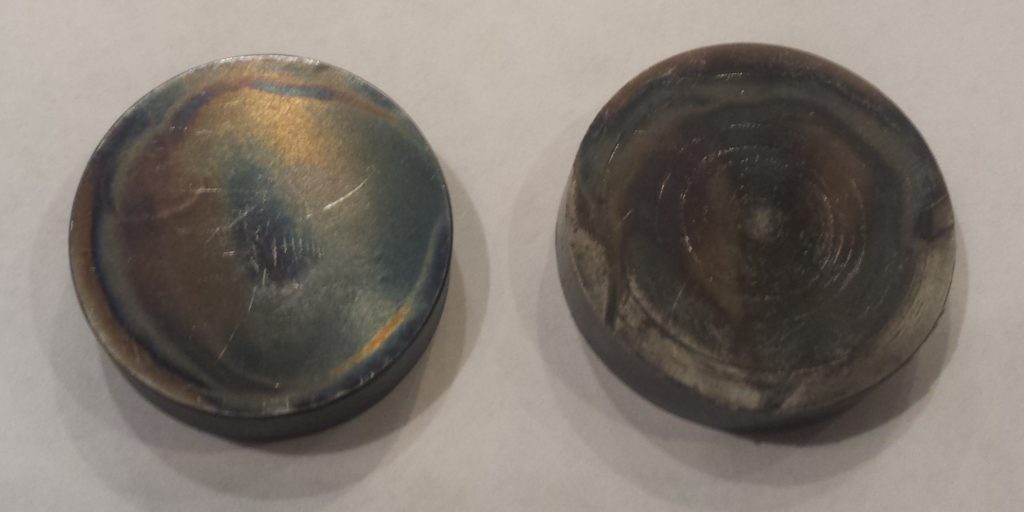
This time around, the lid was removed from the crucible while still in the oven without a problem, and as quickly as humanly possible, the entire crucible was dumped into the aerated water. The results were much more colorful.
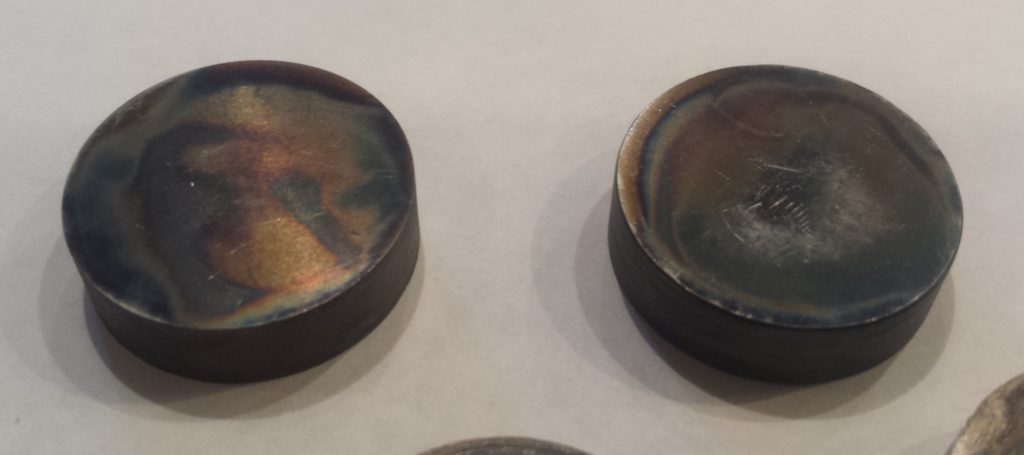
I believe that the key to this go around was simply being able to immerse the samples into the water as quickly as possible. The wire wrapping and tums, for all intents and purposes may have had some impact, but it’s going to take me some more testing to further to see if they’re another form of old wives tales, or an actually useful method.
Next up, I need to test the actual Rockwell hardness of the parts. I haven’t done that as of yet. Hopefully soon. And then next, real parts. Probably some challenge coins for students. “Congratulations on your first CNC crash!”
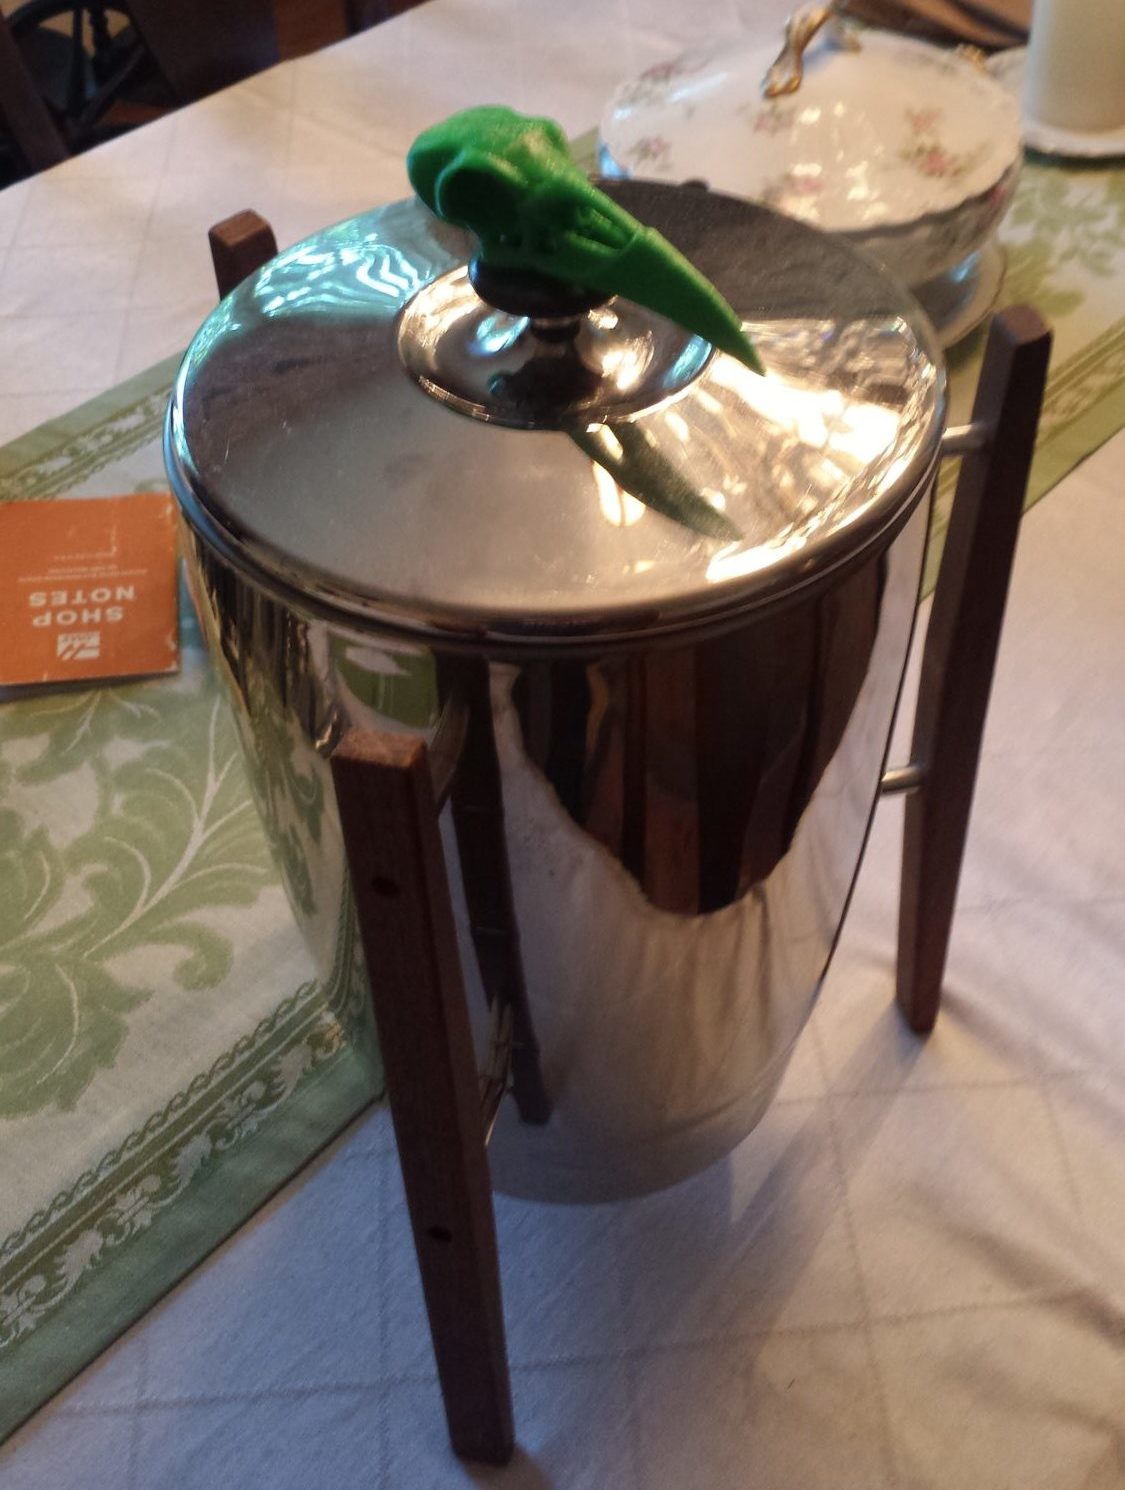
For mother’s day, I gave my mom’s coffee pot a bit of an aesthetic upgrade. Nothing says class like a raven skull.
Yet Another Bad Idea; starting a blog in 2019.