Inconvenient Truths

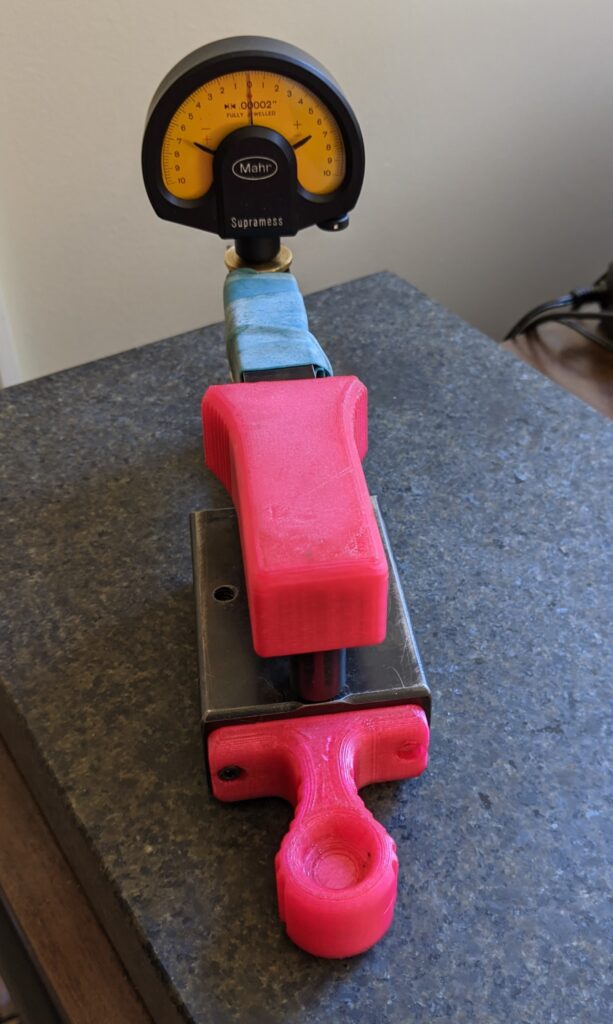
The DIY Repeat-O-Meter is done and works. But there are details I left out, and in honor of transparency and metrology, I think it’s important that I note them before we finish this chapter.
Metrology is just as much about measuring error as it is measuring your part. All measurements have error, the only question is how much? This is something to keep in mind when reading about my experiments in measuring and creating flatness.
First, this actually doesn’t measure overall “flatness.” This measures local variations in height over relatively small areas of a granite surface plate. I think this has been made clear earlier, but it’s worth noting again. And to that end, when I refer to the flatness of surface plates using just this tool, this is just 1 of 2 main tests to measure flatness across the surface. The other test measures overall flatness using an instrument such as an autocollimator.
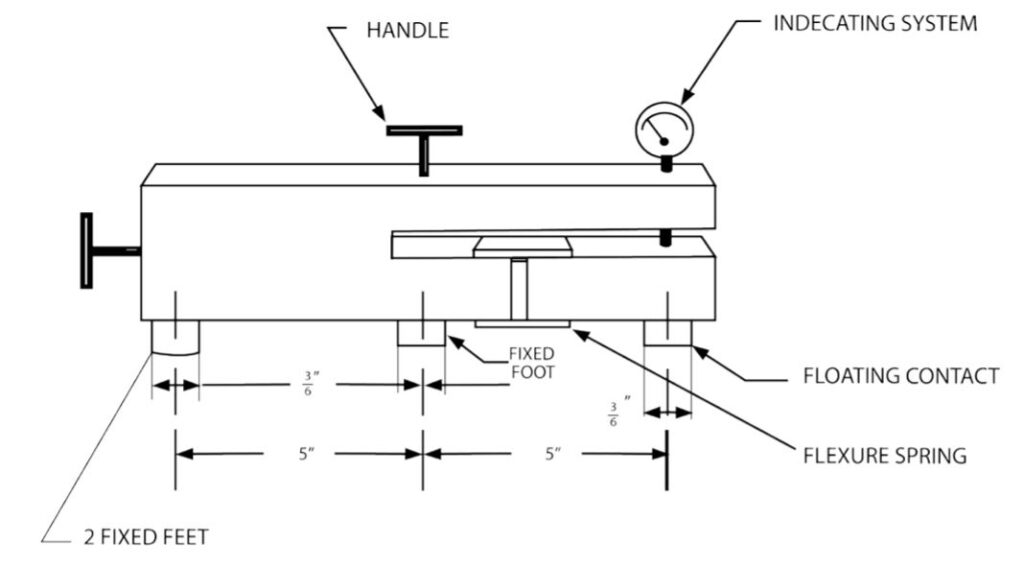
Second, this isn’t a real Repeat-O-Meter, obviously. But it’s not a clone like the NYCCNC/OxTools version either. This was a version designed to help me with my needs for a much smaller surface plate than typically measured. But if you look at the Federal GGG-463c spec, then you’ll see that the design and dimensions for a repeat reading gage is specifically called out.

The ShadonHKW design (which I largely used with modifications) has different dimensions. The major dimensional changes (in regards to precision of measurements) are the difference between the space between the feet, the placement of the 2 side by side feet, and the size of the feet.
The design I chose has the two feet which are side by side in the front, rather than the back, which is the opposite of the way that the Fed spec calls for. Instead of their being 5 inches between the each foot, my design has a spacing of 2.25″ for the 3 feet on the base, and then 3″ between the two front feet on the base and the 1 floating foot on the front arm of the device. The spacing is both less, and slightly inconsistent. I’m not too worried about where the feet are placed, given that the 3 feet should naturally create their own plane, and provide the base for the 1 floating foot that provides the measurements.

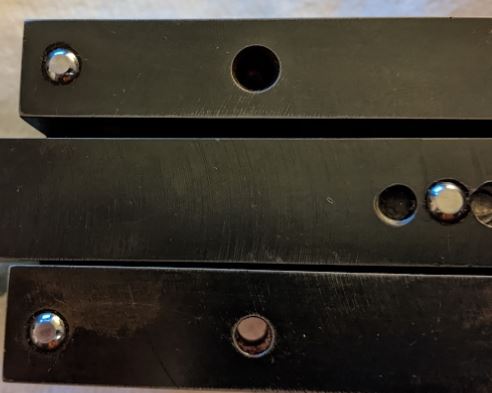
Further the spec also calls for feet with a diameter of 3/8″. I used 1/4″ hardened ball bearings, that were then ground flat. The flat area is approximately 0.150″, less than half of the 0.375″ called for. I had ordered some carbide inserts to use for feet, but they took so long to get to me, that I went with the ball bearings, as I already had 1/4″. But 1/2″ (3/6″ according to the image from the Fed spec) would have been better, as I could have ground them down to a flat 3/8″ diameter.
With smaller feet, and a closer footprint, I believe this will add up to a device that will measure higher variations (especially in terms of highly localized dings/dents in well used surface plates) along a surface plate. One may think that this is better, (higher accuracy in the readings!) but I found it’s a double edged sword when trying to read the gage as you move it across the surface. Too much movement makes it difficult to see the overall average (and any real spikes) in the measurements.
About measuring the surface plates
If you look at the specifications for repeatability measurements (according to the Federal GGG-463c spec), the larger the surface plate, the larger the tolerances allowed. Well, the opposite is true, the smaller the plate, the tighter the tolerances. A small plate should probably have higher accuracy, and thus have smaller localized variations. Meaning that even with my plate, I would want less than 35 millionths total indicated measurement for a Grade AA plate.
With metrology, I’m always wondering about the limits of both my equipment and my technique. I know there’s almost always a way to measure with higher accuracy and precision. I may not know what it that methodology is (or have the equipment), but it helps me think about what I am doing, and what effects it has on the measurements.
Next Up: The looks on peoples faces when I tell them that I spent all weekend rubbing 3 cast iron plates together.
