
So I’ve always thought that AI racing cars would be a blast to watch. I stumbled upon this website a while back which introduced me to DonkeyCars. And so since I already had a bunch of RC stuff and a few Raspberry Pi’s, I jumped in feet first.
To start with, I grabbed an inexpensive RC Car from Banggood. The HS 18311 (awesome name. But also known as the “Extreme Thunder”) At $40 when I bought it, it seemed like a decent deal, especially since I haven’t had an RC Car in years and years.
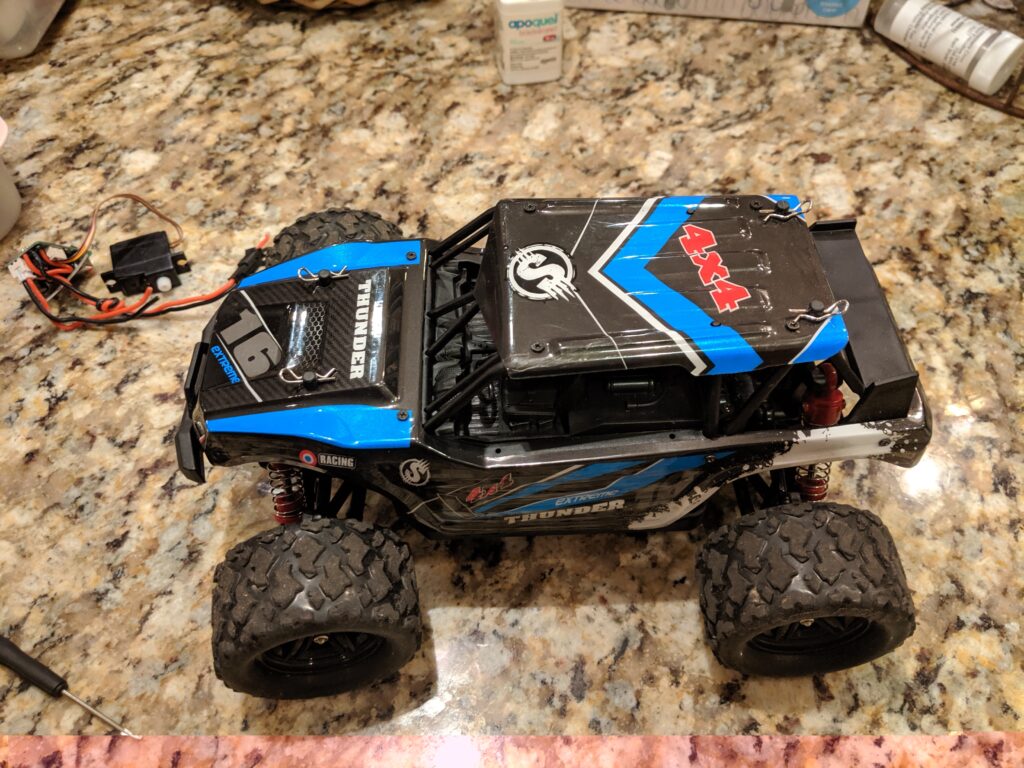
The car itself is pretty quick, and actually quite fun to drive. But as a base on which to create a new DonkeyCar, it’s got a few issues. First of all, it’s has the receiver, ESC (motor controller) and the electronics for the servo in all-in-one package. Great for creating a $40 rc car, bad for hobbyists.
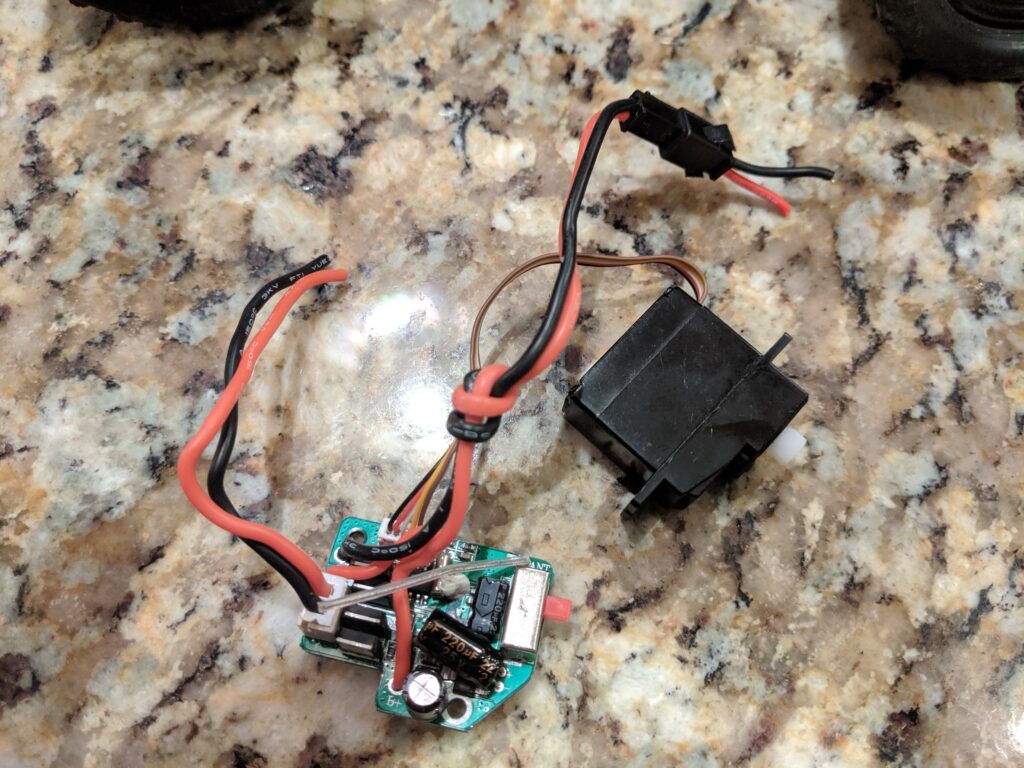
The servo was a 5 wire servo, which I had never even knew existed. Apparently these are “dumb” servos, with all the electronics necessary to run them on the mainboard. So I grabbed a cheap 30amp brushed ESC from ebay, and an emax ES 3103E 17g servo.
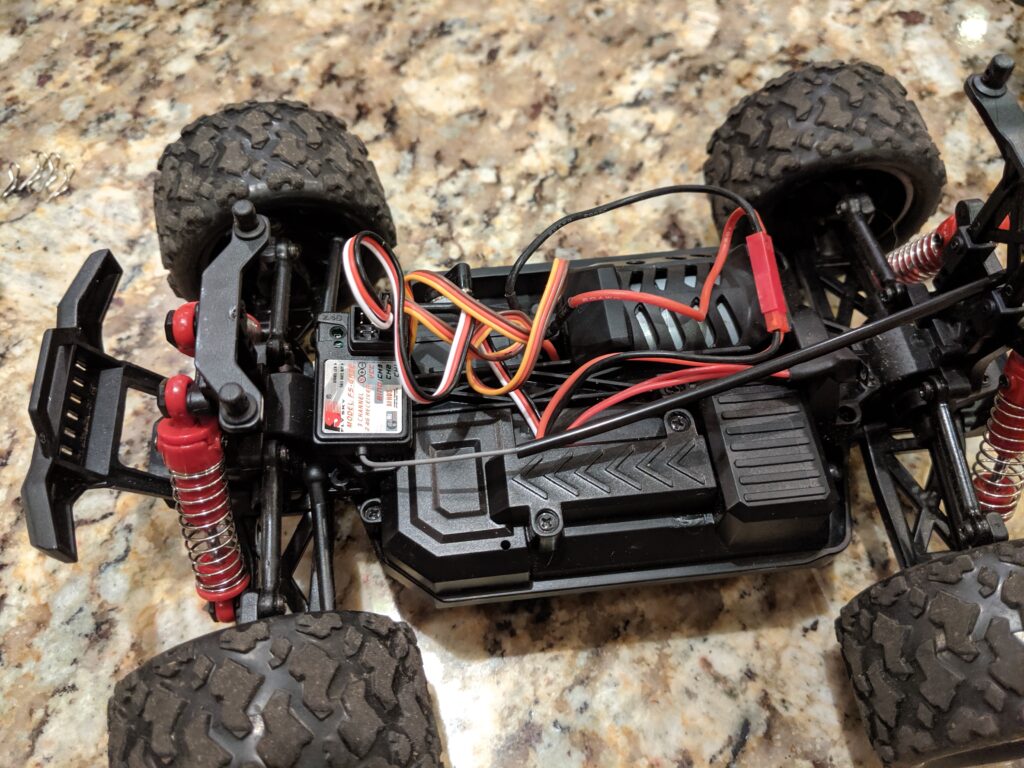
The battery supplied was a 1200 maH 7.4v LiIon battery (two 18650’s) with a non-standard connector (I prefer JST for small batteries/machines, and XT60 for larger capacity or higher amperage uses) I replaced the lead to the battery with a JST, replaced the all-in-one board with the 30a ESC (which fit nicely where the tiny all-in-one board had been. The ES3103E was a direct replacement for the servo holder and the servo saver fit.
Finally, I used the Flysky FS-GT3B transmitter and receiver to hook it all together and it worked fine, while requiring no real changes/mods to the car (I used double sided tape to hold the receiver to the chassis.) This allowed me to test everything without the raspi first, just to make sure the mechanics work. Had to make a slight adjustment to the servo arm, but it worked and I had too much fun driving it.
One of the aspects of this design is that they have molded plastic covers for all of the electronics, even the motor. The Battery compartment can only be accessed from a door on the bottom of the chassis. It’s a nice looking design, and I think it may help to add to the durability of the car, but it makes getting to everything a bit of a pita. Further, the plastic center is attached to the plastic motor cover, which is also the motor holder. This is very subpar for a normal rc car (as it makes it difficult to change the size of motor, as well as providing better motor cooling.) However for our purposes, it’s fine.
But one of the aspects that I really like about this model, is the lack of a one piece canopy. Instead of a truck body, we’ve got a buggy/open cab design. This body has the plastic body with an internal roll cage structure. The seats/steering wheel interior is screwed to the roll cage, and easy to take out which gives us room for a raspberry pi.

I have to make a slightly different case that will allow me to use the 4 screw holes in the roll cage to mount the raspi. But that shouldn’t be too difficult. And with the Pi mounted up near the top of the cab, you still have a decent amount of room to include other electronics and such in the bottom.
I also have to add, that someone has already made a donkeycar chassis adapter for this rc car. You can find it on thingiverse here: Donkey Car Chassis for RC Driver HAT
So next up, actually getting the raspi in there permanently, add the camera, MPU6050 and start getting the DonkeyCar going.